DHT22 是常見的數位溫濕度感測器,能夠同時輸出溫度與相對濕度,精度較同家族的 DHT11 高,適合需要較準確數據的專題。
外觀與接腳
DHT22 一般有 4 支腳(由左至右,正面有網孔朝前):
- VCC – 電源正極,供電 3.3V ~ 5.5V(通常接 Arduino 的 5V 或 3.3V)
- DATA – 數位訊號輸出腳,需外接一顆 4.7kΩ ~ 10kΩ 上拉電阻至 VCC
- NC – 空腳,不需連接
- GND – 電源負極,接 Arduino 的 GND
市面上有許多模組將 DHT22 與上拉電阻整合在一塊小電路板上,這時模組只會露出三支腳:VCC、GND、DATA,使用上更方便。
性能規格(摘要)
| 項目 | 規格 |
|---|---|
| 工作電壓 | 3.3V ~ 5.5V |
| 溫度範圍 | -40°C ~ 80°C |
| 溫度精度 | ±0.5°C |
| 濕度範圍 | 0% ~ 100%RH |
| 濕度精度 | ±2%RH |
| 取樣週期 | 建議 2 秒以上一次(每秒讀取次數過多會導致資料錯誤) |
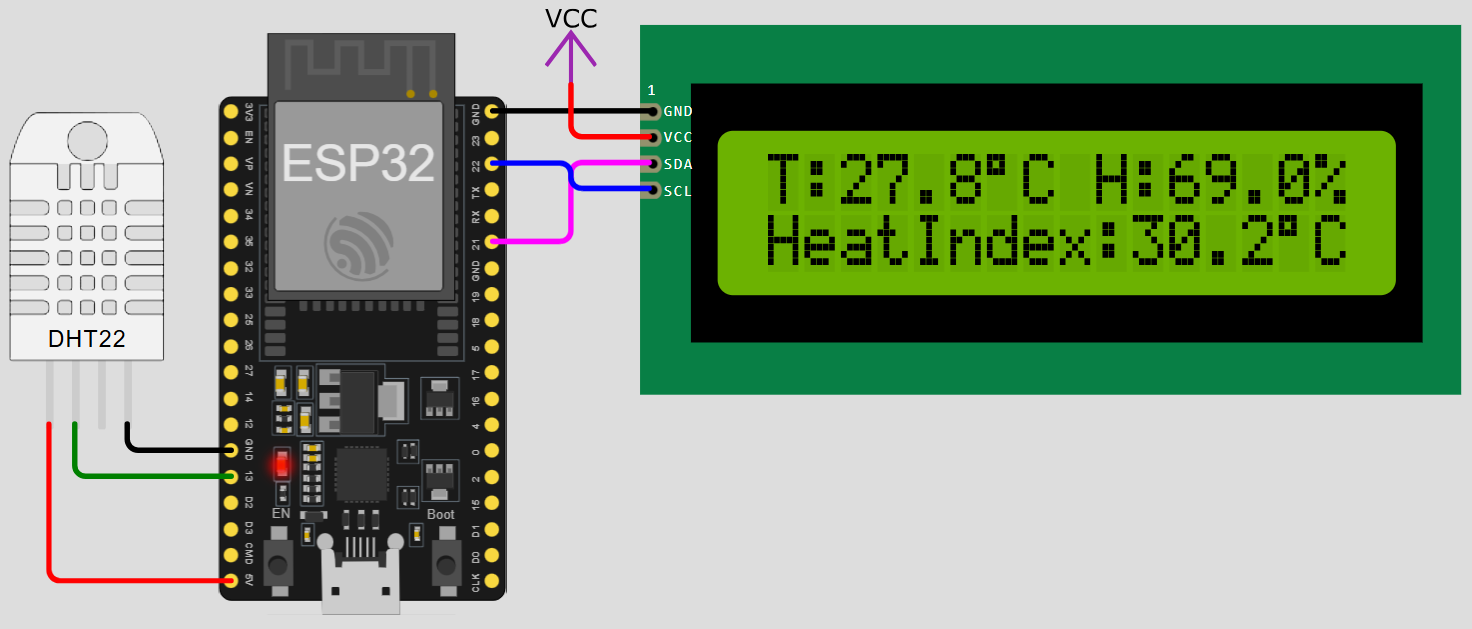
範例程式:
//---------------------------------------------------------------------
#include "DHT.h"            // 引用外部函式庫,名稱DHT
#define DHTPIN 13           // Digital pin connected to the DHT sensor
#define DHTTYPE DHT22       // DHT 22
DHT dht(DHTPIN, DHTTYPE);   // 建立DHT物件,名為dht
float h;    // 濕度資料
float t;    // 攝氏溫度
float f;    // 華氏溫度
float hic;  // 攝氏體感溫度
float hif;  // 華氏體感溫度
//---------------------------------------------------------------------
unsigned long previousMillis = 0;    // 前一次的millis()時間
const long interval = 2000;          // 預設計時的時間
//---------------------------------------------------------------------
void setup() {
  Serial.begin(9600);   // 啟用串列埠監看視窗
  dht.begin();          // 啟用dht物件
}

void loop() {
  unsigned long currentMillis = millis();          // 當前的millis()時間

  if (currentMillis - previousMillis >= interval)  // 若達到預設計時的時間
  {
    //---------------------------------------------------------------------
    // 每經過一個interval的時間,要做的事
    //---------------------------------------------------------------------
    h = dht.readHumidity();         // 取得濕度資料
    t = dht.readTemperature();      // 取得攝氏溫度
    f = dht.readTemperature(true);  // 取得華氏溫度

    // 若讀不到資料,則顯示錯誤訊息,並離開
    if (isnan(h) || isnan(t) || isnan(f))
    {
      Serial.println("Failed to read from DHT sensor!");
      return;
    }

    hic = dht.computeHeatIndex(t, h, false);  // 攝氏體感溫度
    hif = dht.computeHeatIndex(f, h, true);   // 華氏體感溫度

    // 將溫濕度數據顯示在監看視窗
    Serial.print("濕度: ");
    Serial.print(h);
    Serial.print("%,  溫度: ");
    Serial.print(t);
    Serial.print("°C ");
    Serial.print(f);
    Serial.print("°F,  體感溫度: ");
    Serial.print(hic);
    Serial.print("°C ");
    Serial.print(hif);
    Serial.println("°F");
    //---------------------------------------------------------------------

    previousMillis = currentMillis;  // 更新前一次的millis()時間
  }
}
//---------------------------------------------------------------------
#include <LiquidCrystal_I2C.h> // 引用LiquidCrystal_I2C函式庫
LiquidCrystal_I2C lcd(0x27,16,2); // 建立LiquidCrystal_I2C物件,名稱為lcd
//---------------------------------------------------------------------
#include "DHT.h" // 引用外部函式庫,名稱DHT
#define DHTPIN 13 // Digital pin connected to the DHT sensor
#define DHTTYPE DHT22 // DHT 22
DHT dht(DHTPIN, DHTTYPE); // 建立DHT物件,名為dht
float h; // 濕度資料
float t; // 攝氏溫度
float f; // 華氏溫度
float hic; // 攝氏體感溫度
float hif; // 華氏體感溫度
//---------------------------------------------------------------------
unsigned long previousMillis = 0; // 前一次的millis()時間
const long interval = 2000; // 預設計時的時間
//---------------------------------------------------------------------
void setup() {
//--------------------------------------------------------------
Serial.begin(9600); // 啟用串列埠監看視窗
dht.begin(); // 啟用dht物件
//--------------------------------------------------------------
lcd.init(); // 初始化 lcd
lcd.backlight(); // 開啟背光
//--------------------------------------------------------------
}
void loop() {
unsigned long currentMillis = millis(); // 當前的millis()時間
if (currentMillis - previousMillis >= interval) // 若達到預設計時的時間
{
//---------------------------------------------------------------------
// 每經過一個interval的時間,要做的事
//---------------------------------------------------------------------
h = dht.readHumidity(); // 取得濕度資料
t = dht.readTemperature(); // 取得攝氏溫度
f = dht.readTemperature(true); // 取得華氏溫度
// 若讀不到資料,則顯示錯誤訊息,並離開
if (isnan(h) || isnan(t) || isnan(f))
{
Serial.println("Failed to read from DHT sensor!");
lcd.setCursor(0, 0);
lcd.print("Sensor Error! ");
return;
}
hic = dht.computeHeatIndex(t, h, false); // 攝氏體感溫度
hif = dht.computeHeatIndex(f, h, true); // 華氏體感溫度
// 將溫濕度數據顯示在監看視窗
Serial.print("濕度: ");
Serial.print(h);
Serial.print("%, 溫度: ");
Serial.print(t);
Serial.print("°C ");
Serial.print(f);
Serial.print("°F, 體感溫度: ");
Serial.print(hic);
Serial.print("°C ");
Serial.print(hif);
Serial.println("°F");
// 將溫濕度數據顯示在 LCD
// 第一行顯示即時溫濕度
lcd.setCursor(0, 0); // 設定游標於第一行第一格
lcd.print("T:");
lcd.print(t, 1); // 顯示溫度到小數點後一位
lcd.print((char)223); // 顯示 LCD 內建的度數符號
lcd.print("C ");
lcd.print("H:");
lcd.print(h, 1);
lcd.print("% "); // 多加空白清除殘影
// 第二行顯示體感溫度
lcd.setCursor(0, 1); // 設定游標於第二行第一格
lcd.print("HeatIndex:");
lcd.print(hic, 1);
lcd.print((char)223);
lcd.print("C ");
//---------------------------------------------------------------------
previousMillis = currentMillis; // 更新前一次的millis()時間
}
}輸出驅動電路
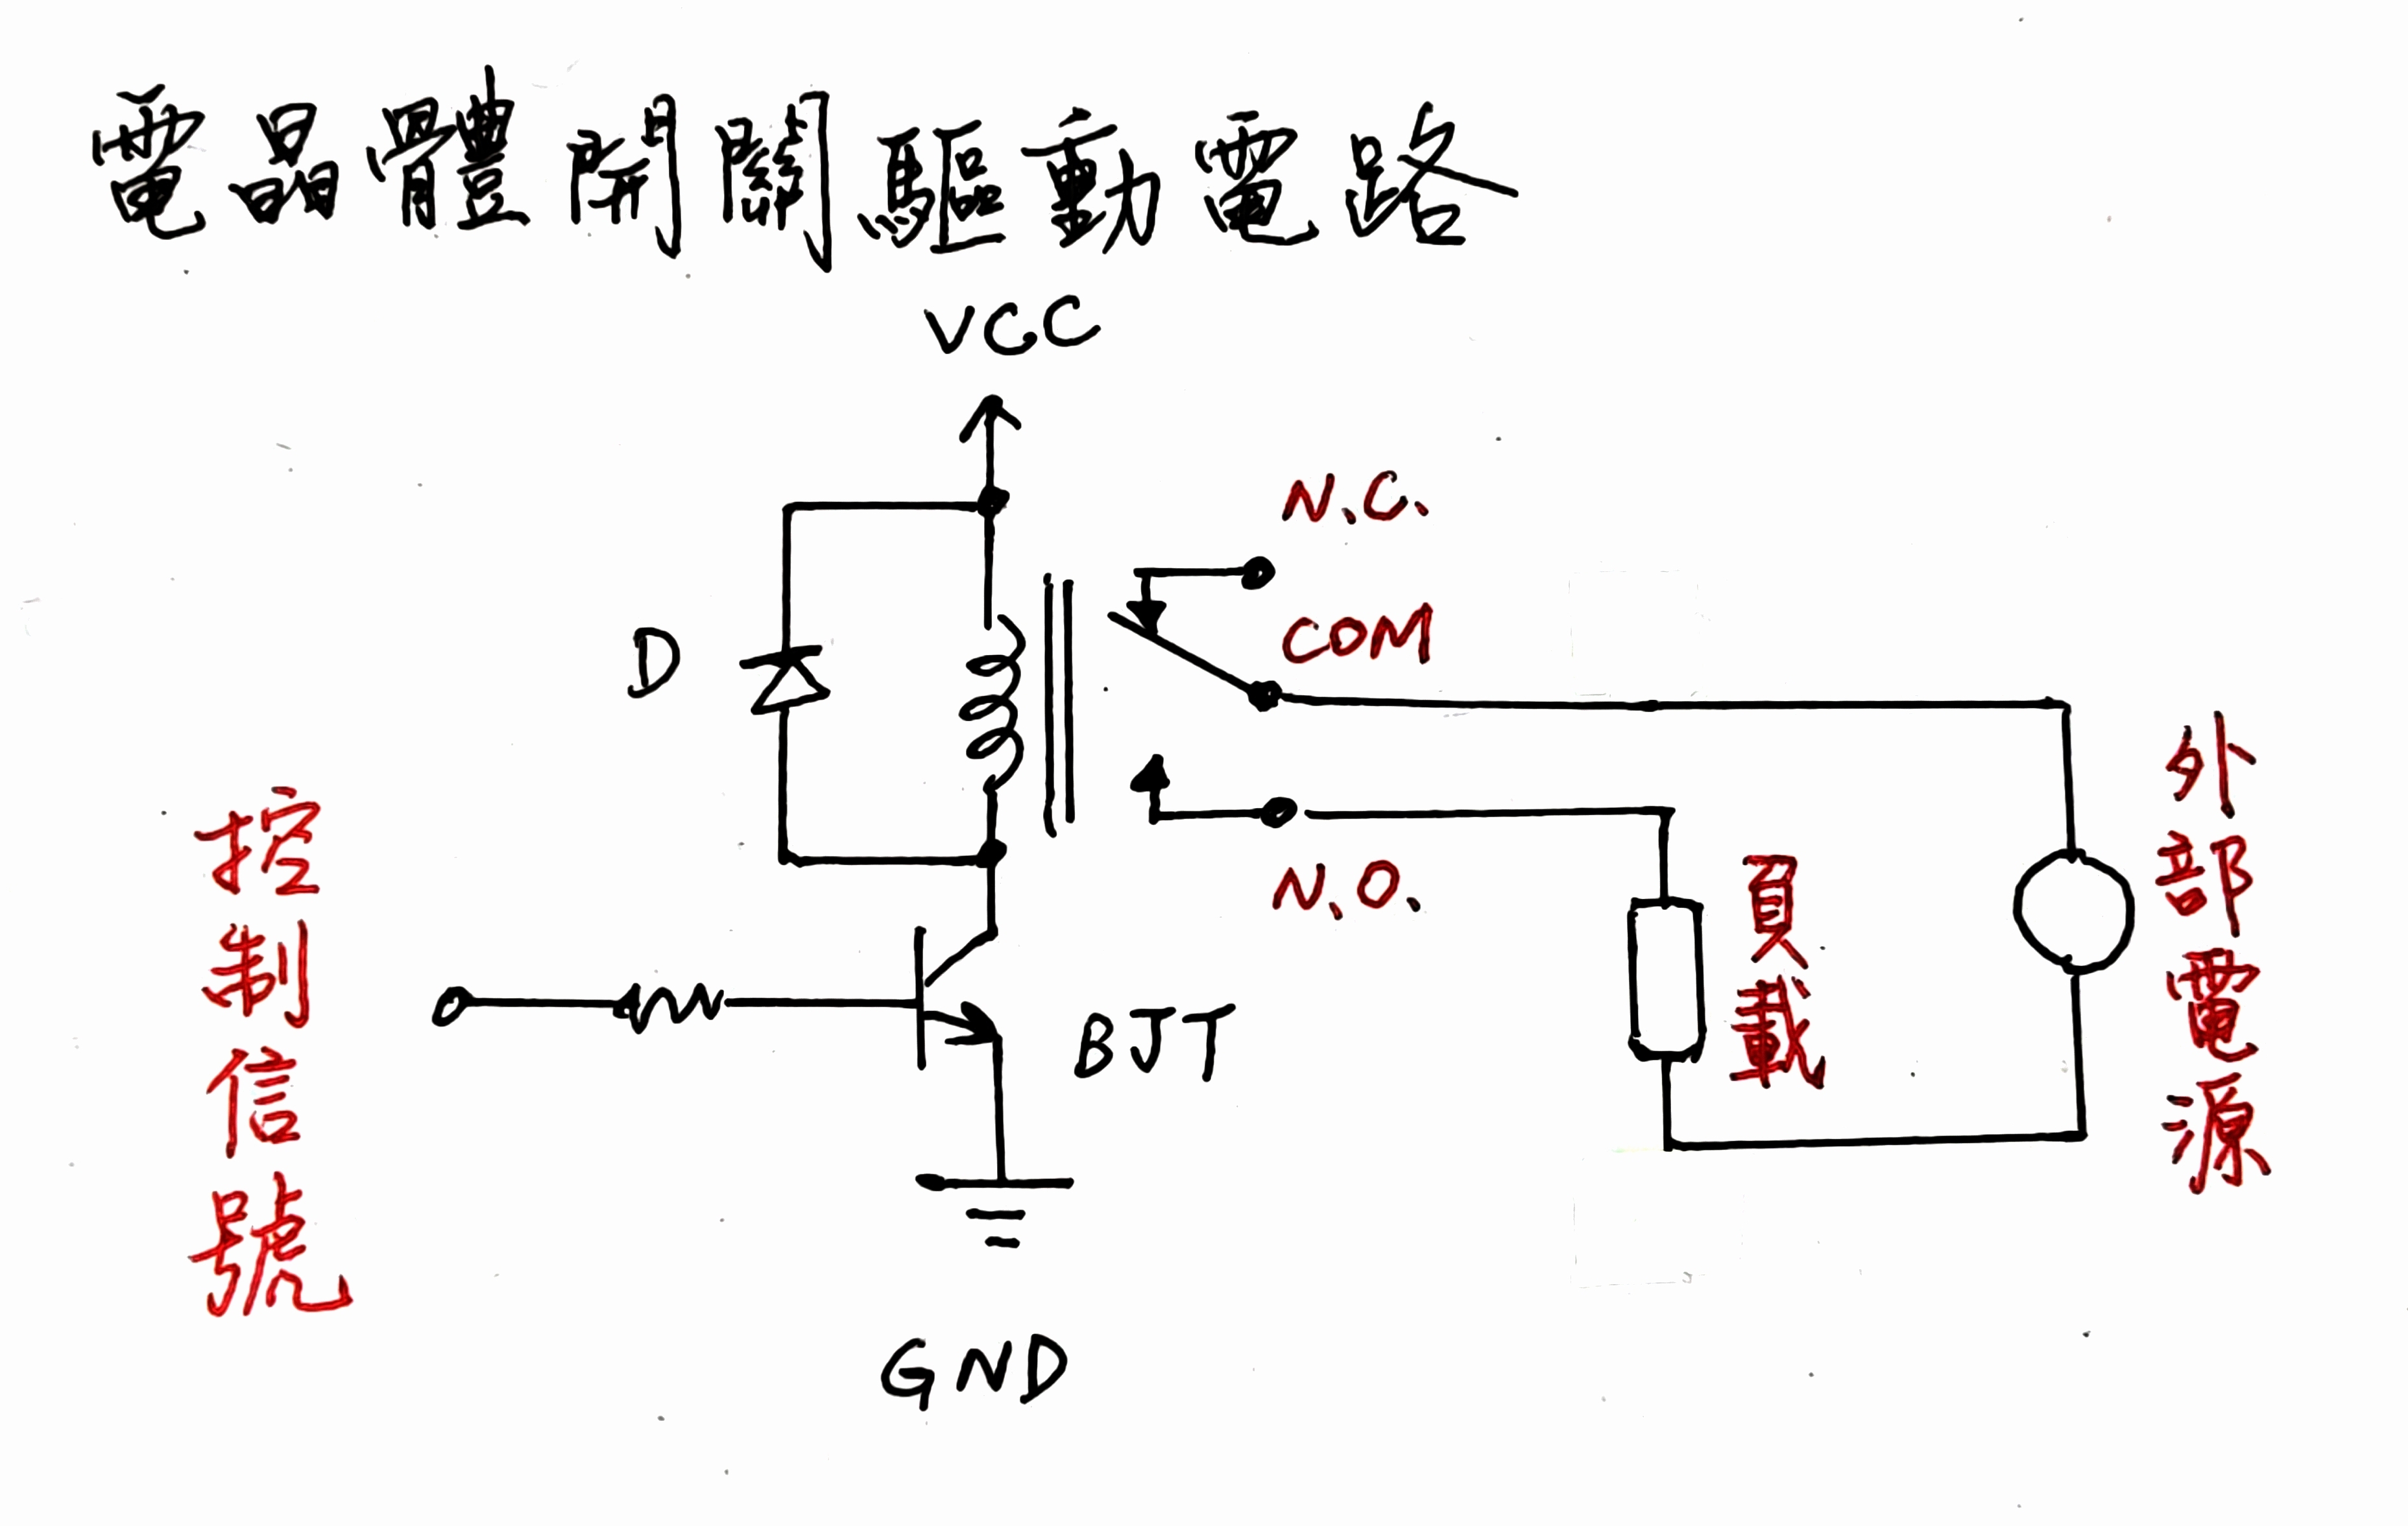
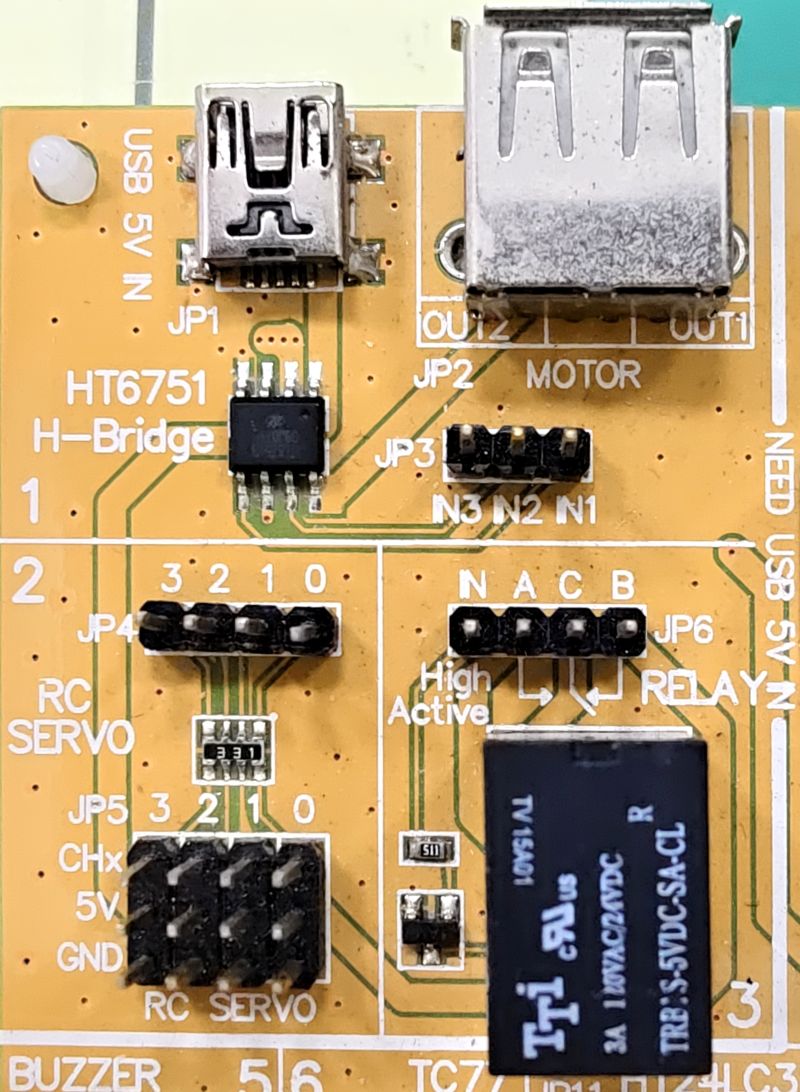
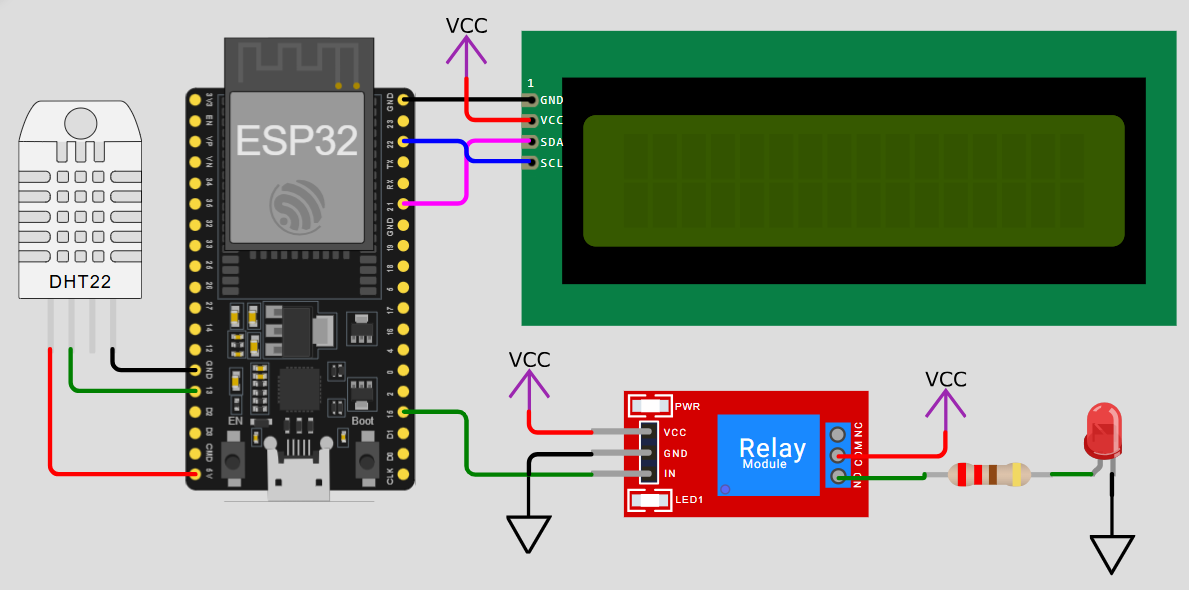
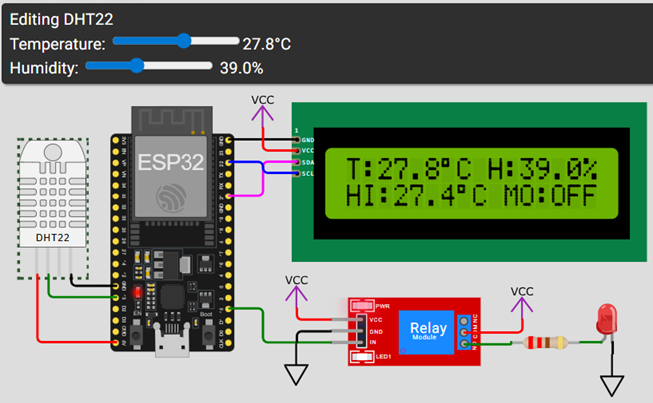
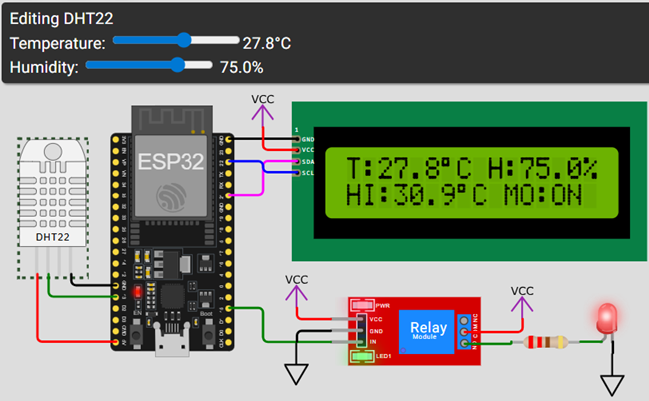
作業練習:
- 利用DHT22偵測環境溫濕度,並將測得的數值顯示於I2C LCD。
- 利用繼電器及LED燈作為輸出驅動電路,模擬除濕機運轉。
- 濕度>70,除濕機運轉,直到濕度<50,除濕機停止運轉。